Github Getting Started
1. Getting Started
GitHub Account
Go to GitHub and sign up for an account:

Note: Remember to use the same e-mail address you used in the Git config.
Create a Repository on GitHub
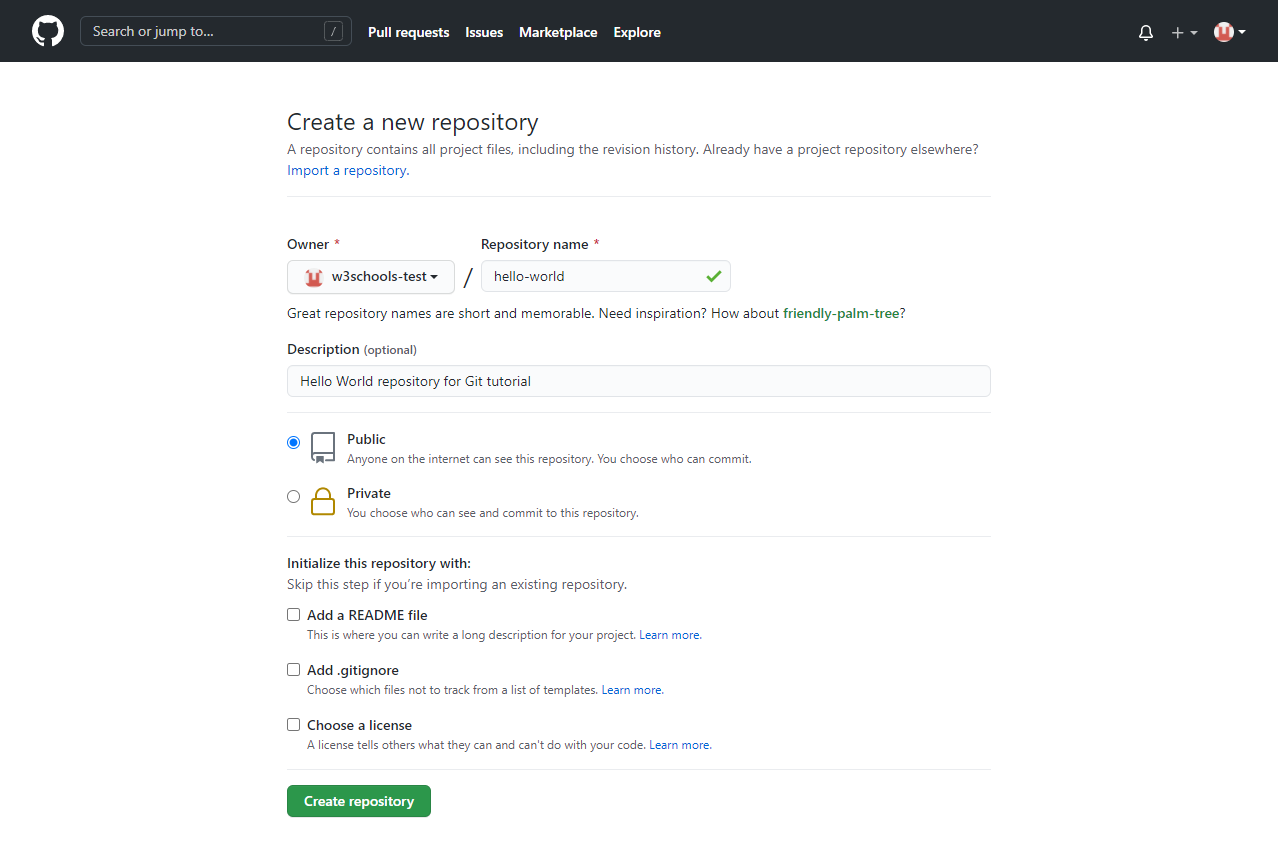
Now that you have made a GitHub account, sign in, and create a new Repo:

And fill in the relevant details:

We will go over the different options and what they mean later. But for now, choose Public (if you want the repo to be viewable for anyone) or Private (if you want to choose who should be able to view the repo). Either way, you will be able to choose who can contribute to the repo.
Then click "Create repository".
Push Local Repository to GitHub
Since we have already set up a local Git repo, we are going to push that to GitHub:

Copy the URL, or click the clipboard marked in the image above.
Now paste it the following command:
Example
git remote add origin https://github.com/w3schools-test/hello-world.gitgit remote add origin URL specifies that you are adding a remote repository, with the specified URL, as an origin to your local Git repo.
Now we are going to push our master branch to the origin url, and set it as the default remote branch:
Example
git push --set-upstream origin master
Enumerating objects: 22, done.
Counting objects: 100% (22/22), done.
Delta compression using up to 16 threads
Compressing objects: 100% (22/22), done.
Writing objects: 100% (22/22), 92.96 KiB | 23.24 MiB/s, done.
Total 22 (delta 11), reused 0 (delta 0), pack-reused 0
remote: Resolving deltas: 100% (11/11), done.
To https://github.com/w3schools-test/hello-world.git
 * [new branch]      master -> master
Branch 'master' set up to track remote branch 'master' from 'origin'.
Note: Since this is the first time you are connecting to GitHub, you will get some kind of notification you to authenticate this connection.
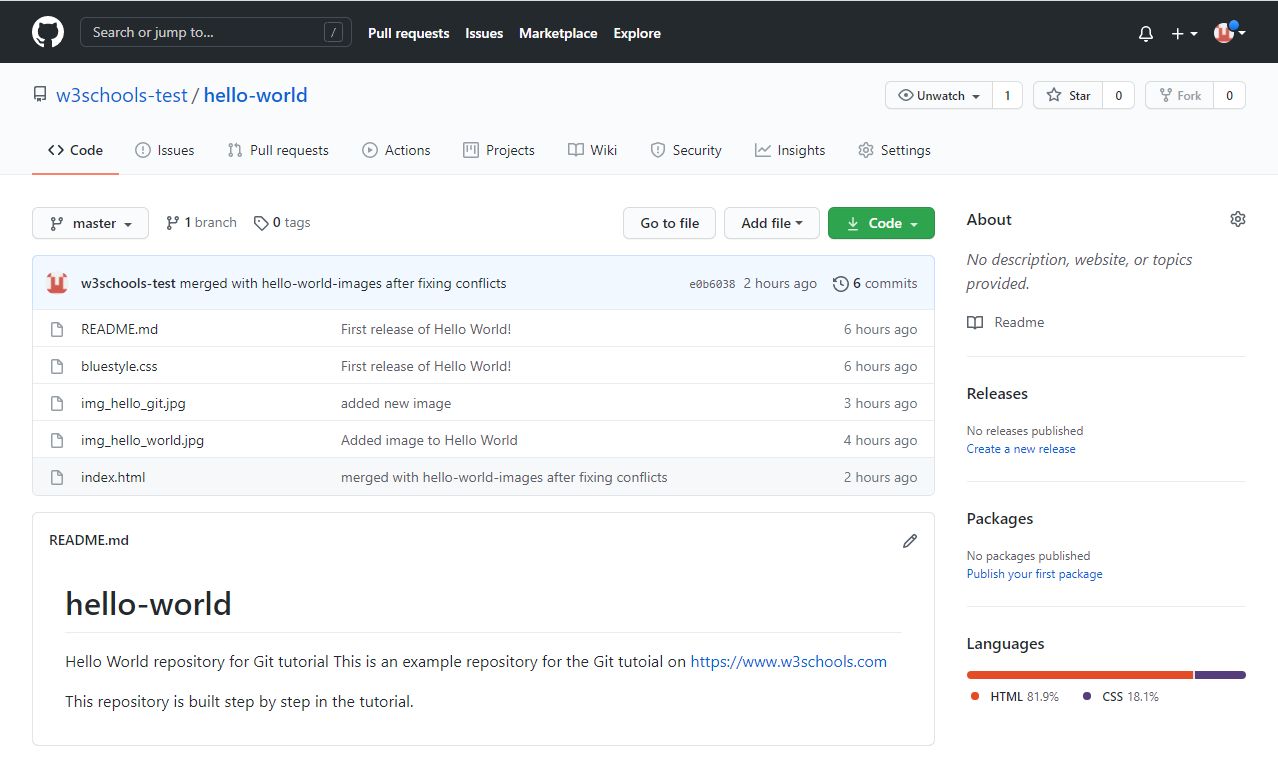
Now, go back into GitHub and see that the repository has been updated:
